If the corners of the bottom layers of your 3D print are curling upwards, you have to deal with warping. It’s one of the most common issues when printing large objects. Luckily, there are many ways to fix it, depending on your situation.
What is warping and what causes it?
You know that your print is experiencing warping when its corners slowly start to lift up from the buildplate and ruin the aesthetic of your print. In extreme cases, this can progress even further until it completely detaches the print from the buildplate and is completely ruined, potentially even damaging the hotend and creating a giant blob of plastic around it.
All of this is caused by the difference of temperature between two different layers. This causes them to cool unevenly, and by a phenomenon called thermal expansion, creating a strong tension in the print and lifting its corners off the buildplate. In some cases this can happen between layers with the bottom ones still correctly attached to the buildplate, this is called layer separation.
There is just one thing to remember: not all plastics are equally affected by warping. Pla for example is much less prone to warping than ABS or PC.
Thermal expansion: “Thermal expansion is the tendency of matter to change its shape, area, and volume in response to a change in temperature.” Source: Wikipedia
How to solve warping
Adjusting the environment
- Adjusting your bed temperature: This is the most basic setting to consider when having warping issues. Generally, your filament manufacturer has a recommended bed temperature. Make sure your bed is working and heating up correctly. If you don’t have a heated bed, try printing plastics that are less affected by warping such as pla.
- Keeping your print warm: as we previously explained, warping is caused by the difference in temperature between two layers. With the heated bed we are warming up the bottom of your 3D print, but a complementary solution can be to prevent it from cooling down to rapidly. But don’t overdo it because this can lead to issues with bridging and overhangs.The first and easiest thing to do is to make sure that the room you are printing in is not too cold, around 20°C (68F) is ideal. It’s also important that there is no cold air blowing across the printer, so maybe turn that AC off. If You really need to print in a cold room or are still experiencing issues, try enclosing your printer with soe cardboard of plexiglass. But pay attention to potential fire hazards!
- Reduce print cooling: This goes in the same direction as the two previous points: reducing the difference in temperature. This can be done by reducing the part cooling fan speed. Inmost slicers this can be set separately for the first few layers, try playing around with that. Some printer or filament manufacturers might have some standard values but it really depends on your specific part. If your part has fine detail, overhangs or bridges you need a higher fanspeed than if you just print a flat mechanical part. With PLA you can go down really low with your fan speed, up to 20% on an ultimaker. This of course highly depends on your printer. Another way to do it is by printing a replacement cooling nozzle which directs the cold air where it’s most needed and reduces its effects on the rest of the print.
- Print a draft shield: In cura there is an experimental setting called the draft shield. This creates a little wall around your print which keeps it warm. I usually don’t print the draft shield all the way up. In my opinion it’s most useful in the lower 5-10 mm of your print.
Improving adhesion
- Use hairspray or glue stick: Improving adhesion is always a good thing (to a certain degree, when it becomes very difficult to remove the part from the buildplate without breaking it). Using either glue stick or hairspray is the most basic practice of 3D printing, with the later one being my favorite because it’s easier to apply and gives the print a cleaner lower surface. The application of either one is simple: smear or spray them on your buildplate before the print. In my personal experience I found that they are best applied with a preheated bed, but opinions may differ. Note that this is not necessary or may even have negative effects if you have a clean PEI sheet installed on your printer.
- ABS juice: This is a pretty old fashioned way of improving the bed adhesion of ABS plastic. This is accomplished by dissolving abs scraps in acetone and spreading the mixture on your bed. This is pretty messy and the acetone fumes are probably harmful. I never had to use this method and I would not recommend it.
- Use a brim or a raft: A brim is a flat single layer area around your print which sticks to your bed. This is probably the first thing to do when having warping issues. Is set up with one click and it’s generally very easy to remove from your print. If the bottom of your model isn’t flat, using a brim won’t work. In such cases a raft might be advisable. A raft is like a grid placed under your print. The downside of a raft is the fact that it’s very hard to remove.
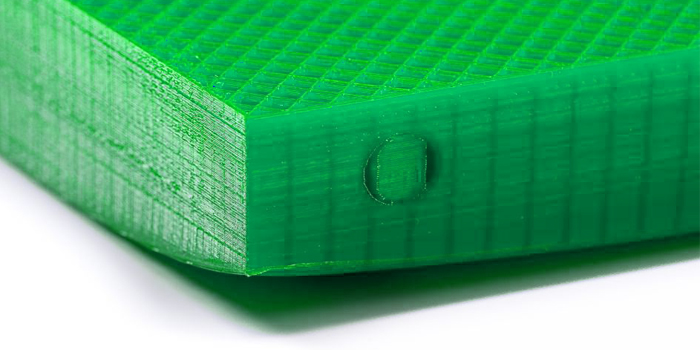
- Try mouse ears: If you can’t or don’t need a brim all around try using mouse ears. It’s like a brim in the form of a small disc, generally one or multiple layers thick, that you manually create and add to your model in your CAD software. Another way to do it if you are dealing with an STL file that’s hard to modify is by creating a disc in your CAD software and combining it with your model within your Slicer.
- Make sure your bed is clean: This is especially true when working with a PEI sheet. Make sure to thoroughly clean your print bed now and then. If you can remove your buildplate, simply clean it under running water. Another way of doing it is with a solvent like IPA (Isopropyl alcohol). But only do this if you know how to handle such substances! Make sure to protect your skin and only do this in a well ventilated area in order to minimize the amount of fumes you’re inhaling.
- Make sure your bed is well leveled: A well leveled bed drastically improves bed adhesion. There is nothing more to say…
Some more ways
- Reduce the layer height: If you reduce your layer height there is less plastic present in each layer, which means there is less material that experiences thermal expansion/contraction when cooling down, thus creating less stress in your part.
- Use less infill:This goes into the same theory as reducing your layer height. With less infil there is less material expanding/contracting in each layer and this greatly reduces the stress on your print.
- Round the corners: If your part still experiences warping in the corners you might as well round those corners off. A rounded shape requires much more stress to actually lift off your buildplate.
- Print Slower: With a slover print speed the difference in temperature between two layers might be increased because the lower layer had more time to cool down, but there are less layers with a difference in temperature present at once, which seems to reduce stress on the part. If none of the above techniques have worked you might as well try that.
Conclusion
Warping is one of the most common problems in desktop FDM 3D printing. It’s an issue that requires quite some trial and error to finally get enough experience to master it consistently. But after some time dealing with it should get an automatism when designing and slicing parts. I hope this article gives you some actionable ways of improving your print quality.