Layer height is one of the most basic parameters in any slicer, but it has far more potential than you might think. In this article we are going to explore its possibilities and limitations, its effect on the strength of your parts and how to get the most out of it.
What is layer height
3D printing layer height is exactly what its name implies: it’s the thickness or height of a layer extruded by an FDM printer. It’s basically the same for SLA or SLS printers. Layer height is the difference in the Z axis between two layers in the X – Y plane.
Layer height can either be measured in plain mm or in microns (increments of 0,001mm). So a layer height of 100 microns equals 0,1mm.
An important thing to consider when modifying your layer height is that this changes your extrusion width, in other words it changes how thick your extruded plastic is spread by the nozzle. Some slicers like cura account for this change, others do not, so you might experience issues with precision in the X – Y plane. This can for example show when you make “print in place” mechanisms.
Another thing to keep in mind when playing with this setting is the minimum layer height of your printer. This value might go as low as 50 microns (0,05mm) for some 3D printers, but more entry level machines might only go down to 100 microns (0,1mm) or even higher values.
It’s also very important to note that you should never increase your layer height above the value of the diameter of your nozzle because this can cause all kinds of problems ranging from extrusion issues to layer adhesion problems.
Resolution vs. Speed
The tradeoff between print resolution and printing time is the most important consideration when changing this parameter. This evolution is linear, contrary to the time/resolution evolution when changing nozzle sizes which is logarithmic. This simply means that if you double your layer height you are dividing your printing time in half and vice-versa.
The resolution of your 3D print in the Z axis also changes linearly when changing your layer height.
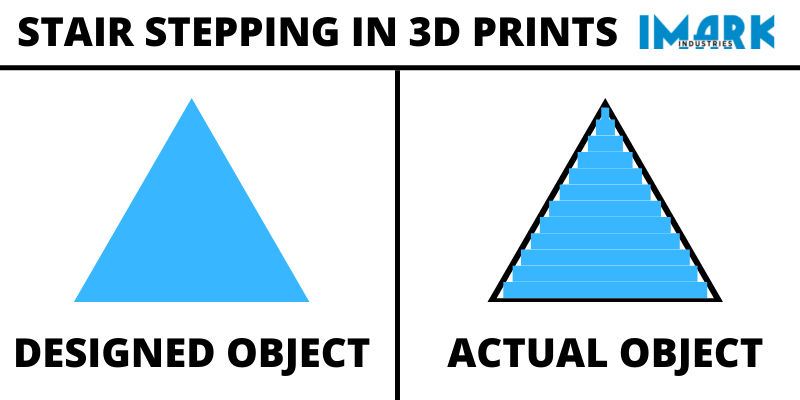
If you are printing certain shapes like slopes, a larger layer height will amplify cosmetic issues like stair stepping. This can be easily circumvented in most situations by choosing your print orientation wisely. 3D prints generally look the best if all the top surfaces are simply flat.

Did you know that most consumer level 3d printers have a higher resolution in the Z axis (vertical) than the X-Y axis? This is due to the fact that most printers don’t make fast moves with a lot of mass and noise from belts and the lead screws in the Z direction.
Part strength and layer height
This is an age old question: Does the layer height affect the strength of 3D printed parts?
The short answer is yes, it does. And it does it in an interesting way:
According to the research of the YouTuber CNC Kitchen layer height affects the strength of your prints both in the X-Y and the Z axis. Another thing that he found is that you should neither go to high nor to low with your layer height setting if you want the sturdiest parts. This is probably caused by a negative effect on layer adhesion if you go too high with your layer height and a degradation of the material due to the fact that the plastic stays longer molten if you go too low on your layer height. I highly encourage you to go watch the video if you are interested to learn more about the subject
From personal experience I found that you get the strongest parts on a well tuned printer if you roughly print at half your nozzle diameter as a layer height or a little lower.
Variable layer height
What is variable layer height?
When slicing 3D prints, one of the hardest decisions to make when setting your layer height is to find the right balance between resolution and speed.
What if we told you that on most modern slicers there is a setting with the help of which you can easily take advantage of the resolution boost of a small layer height and have very little print time penalty!
The slicer simply takes the model and applies modifiers to the layer height in places where there is a lot of detail in the STL file in the direction of the Z axis, thus maximizing quality while saving print time in places where a fine layer height isn’t needed.
How to use variable layer height?
In most slicers there are only a handful of settings to make when working with variable layer height. You have to enable variable layer height, set your base and first layer height as usual and then you only have 2 settings left:
- Maximum layer height deviation: does what it says. If your base layer height is 0,2mm and your max deviation is 0,1mm, your minimum layer height is 0,1mm and your maximum value is going to be 0,3mm.
- Layer height step: it’s basically the maximum difference in layer height you’re gonna get between each step.
Conclusion
To summarize we can say that there is a directly proportional relation between print quality, layer height and printing time and that it’s your job to judge the ideal relation between them according to your needs. To leverage a maximum this effect you should definitely use the variable layer height settings of your slicer as shown above.
As for part strength we can say that you should not really go above half your nozzle size as your layer height to get sturdy parts.

